Monday, September 9, 2013

New Experiment

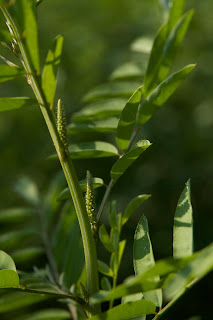
Today, I was greeted by a lot more blooms.


Because the direct dye experiment was so successful, I decided to use that method to try and make indigo extract.  I used the direct dye method up to a certain point.   Let me explain.


I cut 8 ounces of leaves.


Put the leaves in the jar and covered with water then put the jar in a water bath, just like before.


I kept very detailed records of this, but I won't bore you with all of that. 
Basically I heated them, strained the liquid from the leaves and put the liquid back in the jar and aerated it with the immersion blender.  I didn't take pictures of that, it was just like before.

At the point where I would add ammonia and Spectralite to reduce it, instead, I added a little lime and continued with the aeration until it looked like this.


I've covered the jar and will let it sit overnight, hoping the indigo will precipitate out and fall to the bottom of the jar.  In the morning I will either have a wonderful "mud" of dark blue indigo pigment at the the bottom of the jar or it will be a big bust!

If it's a big bust, then back to the drawing board.  If it's successful then I'll do another batch with a larger quantity of leaves.  Say a prayer and keep your fingers crossed that I have  blue "mud".  

A big thank you to Casey Price for her invaluable help and moral support today!


Friday, September 6, 2013

Beauty Shots

Indigo blooms are not particularly showy but they are a lovely salmon color.


If you look closely at the bottom of this bloom you'll see the tiny seed pods starting to form.

They are small but lovely!


This particular plant is approximately 10 ft. tall! 


This one is around 9 ft. tall.  Look at all those little blooms starting to grow!  We're going to have a good supply of seeds
for next year and that's a very good thing!


Wednesday, September 4, 2013

Harvest Time

This morning I was greeted by hundreds and hundreds of little blooms on the indigo plants.


Next week will be the time to start picking the lower leaves and processing them into indigo extract.  I'm only going pick the lower leaves and leave the branches with the blooms so I will have seeds for next year.


The next post will be pictures of the finished extract!  I can't wait!!


Tuesday, August 27, 2013

Carolina Blue

Today I decided it was time to test the indigo and see how much indican is in the leaves.  A friend, Lynn Pollard helped me, thanks, Lynn!  We used the direct dye instructions in Rita Buchanan's book, A Dyer's Garden.

The plant we cut was one that had small buds on it.  We ended up with approximately 5.5 ounces of leaves.  The directions called for 8 ounces.


The leaves were put in a gallon jar and covered with warm water then placed in a water bath to heat to 160 degrees over a 2 hour period.


After a while, the water in the jar started turning an amber color.  That's a good thing!


The water in the jar started showing signs of blue.  A very good thing!!


Toward the end of the 2 hours, the water was a dark amber tea color.


At that point it was time to strain the leaves.


After adding the liquid back to the jar, I used an immersion blender to aerate the liquid, it didn't take long for it to turn a very dark blue with those lovely blue bubbles on top.
After adding ammonia and Spectralite, it sat for another hour in order for it to reduce.

At the end of the hour it was a dark yellow/green.  At that point 2 ounces of scoured yarn was added and let sit for 15 minutes.  This is what happened!


A beautiful, intense blue!

I started adding small skeins of yarn, one at a time, each one sitting for 15 minutes until all the indigo was used up. 


Carolina Blue!!


Monday, July 29, 2013

Catching Up!

Today I found the first bloom on an indigo plant!  It won't be long before we start harvesting and processing it into extract.


 A couple of weeks ago I was given a wonderful gift of some Indigofera suffruticosa pods.  As  you can see from the photo below, the seeds, which are the little black dots on the left side, are quite small.   It took me a while to extract the seeds from the pods.  While working on the pods at night I was clearing and preparing more land on which to plant them during the day.  Luckily I had help from some of the farm interns.  Thank you interns!

You can tell they are Indigofera suffruticosa because they have curved pods.   Indigofera tinctoria  has straight pods.

These seeds are quite robust as they came up after only a week in the ground.  If we have a long warm Fall we should be harvesting and processing until the first frost.

Once the indigo comes up, they grow very fast.  Some of the plants are now over my head.


I've also been introducing some of the interns to dyeing with indigo.  We've been having such fun!

Just a couple of the many things we dyed that day drying on the brush fence.

Emma wants to be a part of everything we do.  I'm surprised she doesn't have blue spots on her muzzle!


One more picture of the indigo.

Thursday, June 6, 2013

Indigo fermentation vat with a little help from my friends

Today I decided to start an indigo fermentation vat at the farm.  I had four helpers, Casey the farm owner and three sisters who are learning about goat keeping and now want to learn about natural dyes.


Let  me introduce you to Elizabeth, Lauren and Danielle.  Elizabeth and Lauren are "animal people" and Danielle is a "plant person".  All three are learning to milk goats.  In the picture they are holding the ground madder root, wheat bran, washing soda which is in the vat and indigo extract in the basket.


Casey adding hot water to the washing soda to dissolve it.


The girls carrying the vat to the green house where we will keep it until after the tropical storm passes.
I love this picture!  That's Emma following behind.


Adding the wheat bran and the ground madder root.


Having no experience with natural dyes, they were amazed at the intensity of red from the madder root.  Beautiful!


We moved the vat into the green house for the  time being.  Here we're adding the indigo.  If you look out the window of the green house you can see the indigo growing.


Now it's all ready to start the fermentation process.  By the weekend it should be very warm outside (in the mid 90's) and I'll then move it out of the green house.  With temperatures that high it shouldn't take too long to ferment!


I just like this picture, indigo vat in the front and growing indigo out the window!

(I did put the lid on it, don't worry!)

Next week the girls are going to learn how to scour and mordant yarn.  Then we'll dye it!

Tuesday, June 4, 2013

Rain, rain, rain!

Yesterday, the indigo got around 2.5 inches of rain.   Woohoo!  Today it was perfect indigo growing weather: low 80's, sunny, and the humidity was somewhere around 75-100% (yes, it was that high).  The humidity was hard on me, but the indigo loved it.  I've been drinking water all day and still can't get enough.  But the indigo is growing and new ones are springing up every day!